Chapter 3: BitWarden Application Setup
- Step 1. Configure On-Premises DNS
- Step 2. Install Docker & Docker Compose
- Step 3. Create BitWarden Service Account
- Step 4. Configure Firewall for HTTP & HTTPS
- Step 5. SSL Configuration (Let's Encrypt W/ ACME Challenger)
- Step 6. Create BitWarden Account & Organization
- Step 7. Retrieve Installation ID & Installation Key
- Step 8. Install BitWarden
- Step 9. Update SSL Settings in BitWarden's Configuration File
- Step 10. Copy SSL Certificate to BitWarden's Environment & Initialize BitWarden
- Step 11. Create Self-Hosted BitWarden Account
- Step 12. Enable SMTP
- Step 13. Promote Self-Hosted BitWarden Account to Admin
- Step 14. Verify Self-Hosted BitWarden Account's Email
- Step 15. Import Organization's License File
- Proceed to Chapter 4
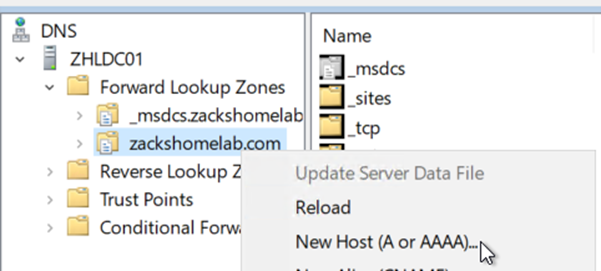
- This will vary on the organization. I use Active Directory for my DNS Server. So, I'll need to add a DNS 'A' Record and 'PTR' Record for my BitWarden instance.
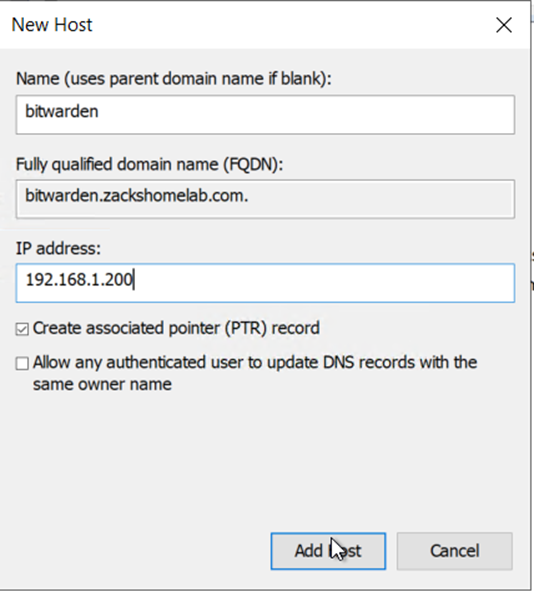
- My DNS 'A' record will be 'bitwarden.zackshomelab.com'. The PTR record will be created upon creation of the 'A' record, like so:
(These instructions are based off of Docker's documentation: https://docs.docker.com/engine/install/ubuntu/)
- Uninstall older versions of docker:
sudo apt-get -y remove docker docker-engine docker.io containerd runc
- Update the apt package index and install packages to allow apt to use a repository over HTTPS:
sudo apt-get -y update && \
sudo apt-get -y install ca-certificates curl gnupg lsb-release
- Add Docker's official GPG key:
sudo mkdir -p /etc/apt/keyrings && \
curl -fsSL https://download.docker.com/linux/ubuntu/gpg | sudo gpg --dearmor -o /etc/apt/keyrings/docker.gpg
- Use the following command to set up the repository:
echo \
"deb [arch=$(dpkg --print-architecture) signed-by=/etc/apt/keyrings/docker.gpg] https://download.docker.com/linux/ubuntu \
$(lsb_release -cs) stable" | sudo tee /etc/apt/sources.list.d/docker.list > /dev/null
- Update the apt package index:
sudo apt-get -y update
- Install Docker Engine, containerd, and Docker Compose:
sudo apt-get -y install docker-ce docker-ce-cli containerd.io docker-compose-plugin
- Create the BitWarden account. This account will be added to our docker group:
sudo adduser bitwarden --no-create-home --ingroup docker
- We will need to open HTTP/HTTPs for BitWarden. This will vary per environment but for my example, I'll only allow HTTP/HTTPS to my 1 VLAN:
sudo ufw allow from 192.168.1.0/24 proto tcp to any port 80
sudo ufw allow from 192.168.1.0/24 proto tcp to any port 443
sudo ufw reload
- This will vary by organization. In my setup, I use Let's Encrypt with a CloudFlare ACME Challenger. The setup is pretty similar until Step 8 on the install process as you may need to install a different certbot plugin (e.g., if you use Google DNS, you'd install certbot-dns-google). If you have your own setup, proceed to Step 6.
- If you also use CloudFlare and want to use Let's Encrypt. Follow these steps:
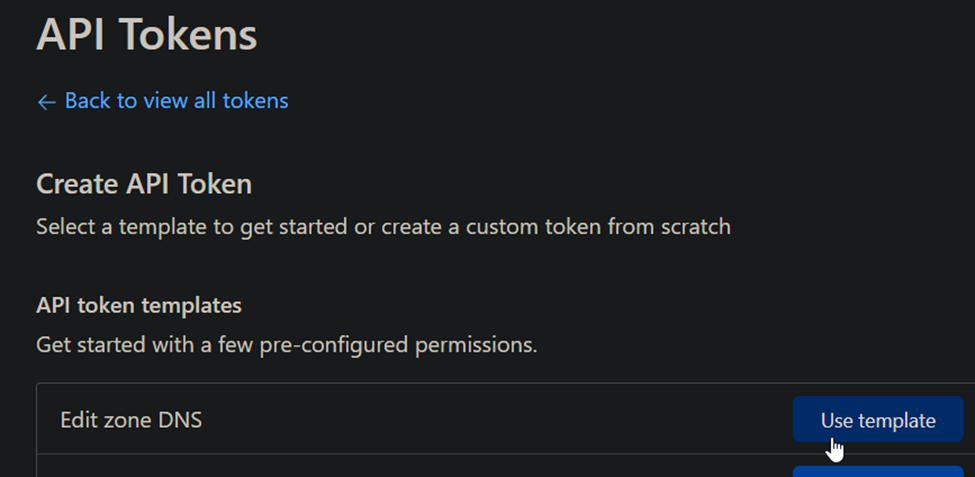
- Browse to https://dash.cloudflare.com/profile/api-tokens
- Click Create Token

- Under API Token Templates, select Edit Zone DNS:
-
- Token Name: Let's Encrypt API Token
-
- Permissions: Zone, DNS, Edit
-
- Zone Resources: Include, Specific Zone, select your domain(s)
-
- Client IP Address Filtering: I personally set this to my Static IP. So, I'd input a CIDR Notation such as 8.8.8.8/32 (this is just an example)
-
- TTL: I personally set these tokens to 6 months and have reminders set.
-
- Click Continue to summary
- Save this API Token for Later
- Install Certbot and its ACME Challenger
- Update the System:
sudo apt-get -y update
- Remove certbot:
sudo apt-get -y remove certbot
- Install Snapd:
sudo apt-get -y install snapd
- Install Snap Core and refresh it:
sudo snap install core; sudo snap refresh core
- Install Certbot:
sudo snap install --classic certbot
- Prepare the cerbot command:
sudo ln -s /snap/bin/certbot /usr/bin/certbot
- Confirm plugin containment level
sudo snap set certbot trust-plugin-with-root=ok
- Finally, install the cloudflare certbot plugin:
sudo snap install certbot-dns-cloudflare
- This file will hold your CloudFlare API Token created in Step 5a.
sudo cat > ~/acme.credentials <<EOF
dns_cloudflare_api_token = REPLACE_THIS_WITH_YOUR_API_TOKEN
EOF
- Update the file's permissions:
sudo chmod 600 ~/acme.credentials && \
sudo chown root:root ~/acme.credentials
- This will vary by your domain and environment. If you have access to a DNS Server, you can request your certificate by using host 'bitwarden.example.com' and replace 'example.com' with your domain's name. This is what I'll be doing. So, my command would look something like this for my initial certificate:
sudo certbot certonly --dns-cloudflare --dns-cloudflare-credentials ~/acme.credentials --dns-cloudflare-propagation-seconds 60 -d bitwarden.zackshomelab.com
-
- Type in the email address to receive alerts for 'if' your certificate doesn't renew (IIRC you are reminded quite a bit ahead of time if there's an issue).
-
- Accept the TOS
- Auto-renewal will be explained in Chapter 4. BitWarden Maintenance
- Note, thie step assumes you have NOT created an organization within BitWarden and that you have NOT created a BitWarden account. I'll be demonstrating how to setup both of these assumptions. The BitWarden account here is used for license management, self-hosted installation ID, self-hosted key, and the creation of your organization.
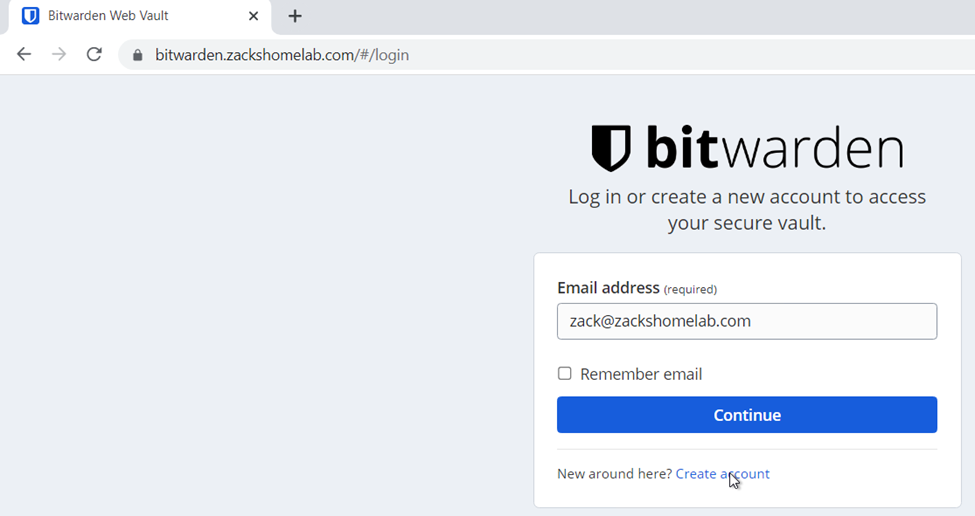
- Browse to https://vault.bitwarden.com/#/login
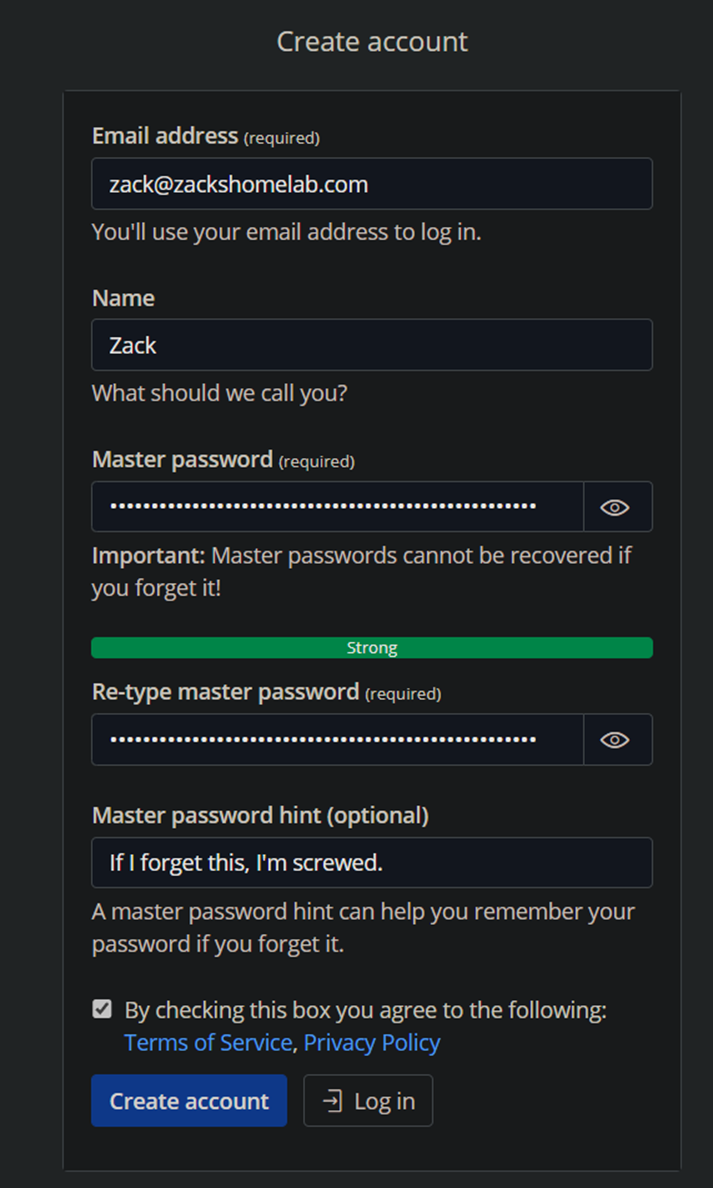
- Input your email address and click 'Create account'
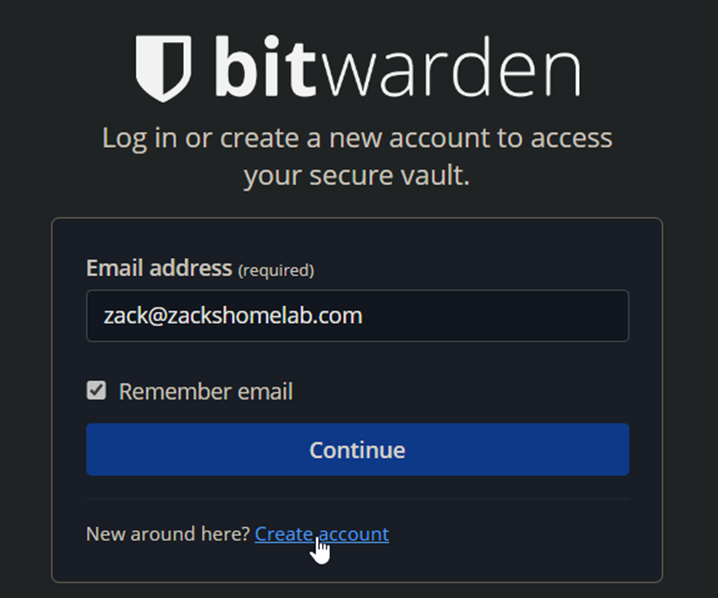
- The instructions are self-explanatory, create your account:
- Once created, login:
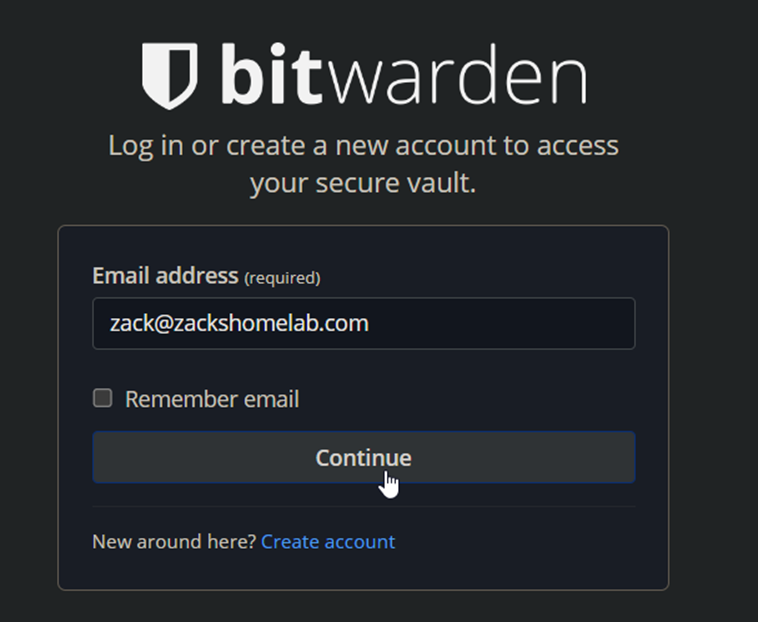
- Input your master password
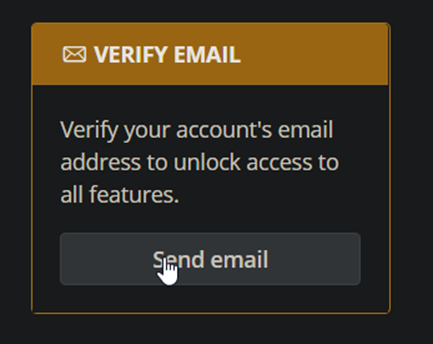
- Upon login, click 'Send Email' under Verify Email:
- I will be purchasing an enterprise license for this guide as I want to demonstrate as much as you can with BitWarden. You do NOT need to purchase an enterprise license to setup a self-hosted version of BitWarden. All you need to do is to pay the annual $10 and you're good to go. However, this documentation is under the impression of individuals deploying this to their organization.
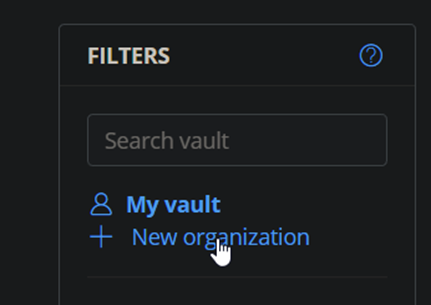
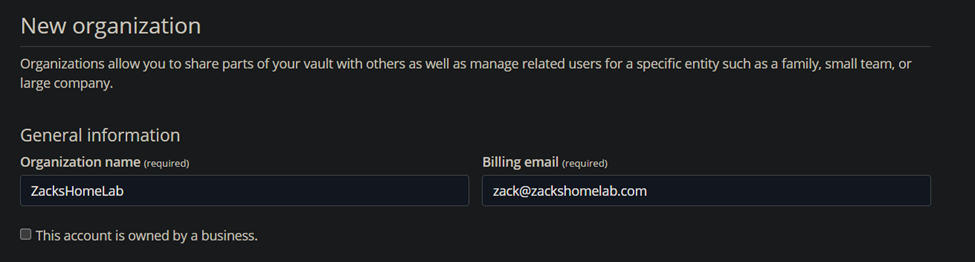
- Click 'New Organization' on the left-hand side:
- For self-hosted organization options, you have to at least have a 'Families' or greater license. This is not required for personal BitWarden self-hosted options as the annual payment would suffice and give you this ability.
- The license you pick is dependent on your organization. I eventually want to configure SSO so I'll need the Enterprise license:
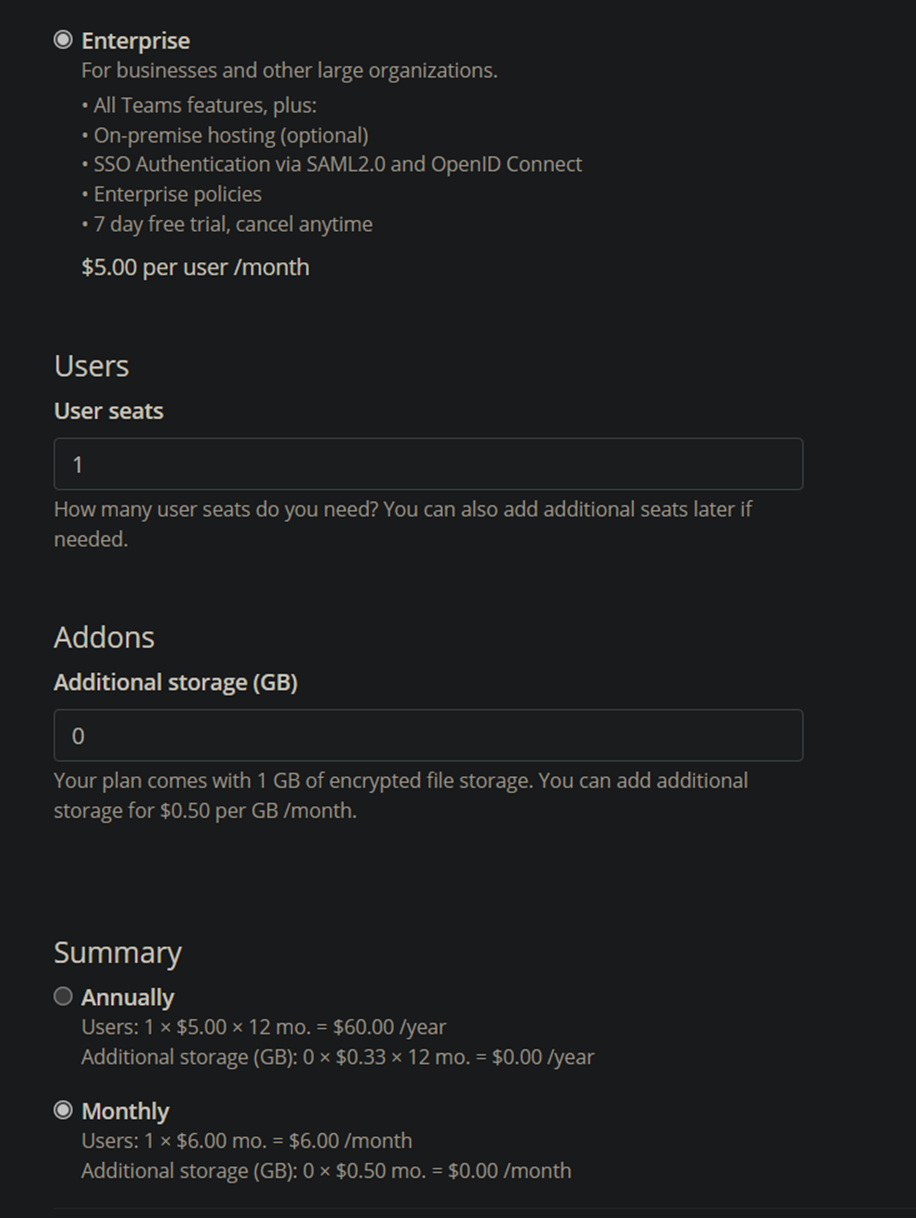
- Once payment has been submitted, we can proceed with the next step!
- Once you have created your organization/account, browse to the following URL to request an Installation ID & Key: https://bitwarden.com/host/
- Input your Admin Email Address for BitWarden
- Store the installation ID & Installation Key in a safe place as you will need them randomly throughout this installation procedure.
- Create the BitWarden directory:
sudo mkdir /opt/bitwarden
- Assign permissions to this directory:
sudo chmod -R 700 /opt/bitwarden
sudo chown -R bitwarden /opt/bitwarden
- switch to the BitWarden user:
sudo su bitwarden
- Change to BitWarden's directory:
cd /opt/bitwarden
- Download BitWarden's installation file:
curl -Lso bitwarden.sh https://go.btwrdn.co/bw-sh
- Set the file's permissions:
chmod +x bitwarden.sh
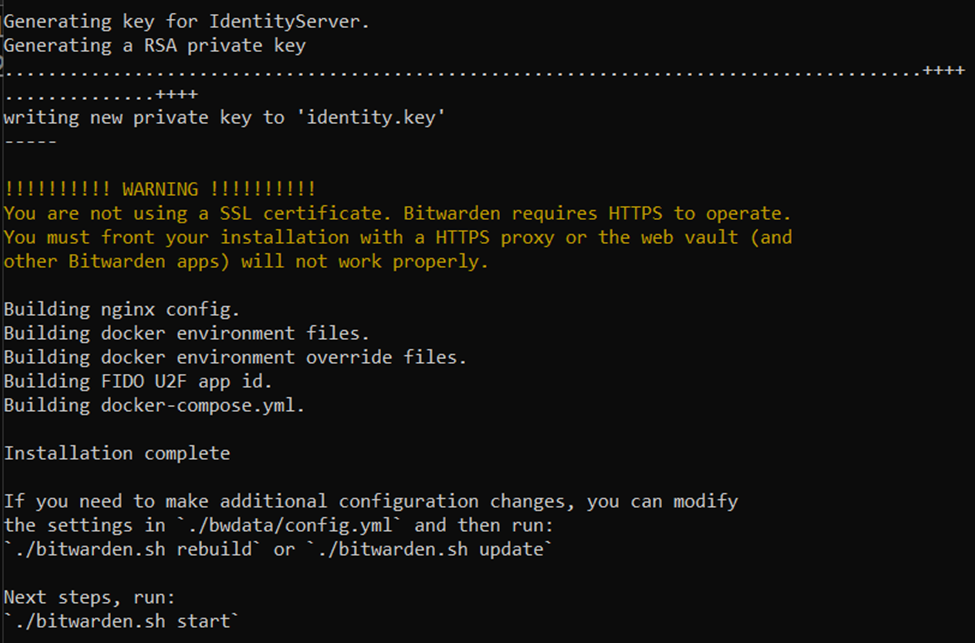
- Run the installer:
./bitwarden.sh install
-
- Enter the domain of your BitWarden instance (e.g., bitwarden.example.com)
-
- Do you want to use Let's Encrypt to Generate a SSL Certificate?: This varies on your environment. If you used an ACME challenger, you will select 'n' for this question. Since I did, I'll be inputting 'n'
-
- Enter the database name for your Bitwarden instance (ex. vault): vault
-
- Enter your installation ID (from Step 6):
-
- Enter your Installation Key (from Step 6):
-
- Do you have a SSL certificate to use? (yn): If you were like me and used a Let's Encrypt ACME Challenger, type 'n'
-
- Do you want to generate a self-signed SSL certificate? (y/n): n
- While still as the bitwarden user on your server, let's open our configuration file for BitWarden:
nano /opt/bitwarden/bwdata/config.yml
- Update the following lines:
| Current Values | New Values |
|---|---|
| ssl: false | ssl: true |
| # Replace example.com with your domain | |
| ssl_certificate_path: | ssl_certificate_path: /etc/ssl/bitwarden.example.com/fullchain.pem |
| # Replace example.com with your domain | |
| ssl_key_path: | ssl_key_path: /etc/ssl/bitwarden.example.com/privkey.pem |
| # Replace example.com with your domain | |
| ssl_ca_path: | ssl_ca_path: /etc/ssl/bitwarden.example.com/chain.pem |
- Example of my configuration file changes:

- NOTE: the above paths do NOT exist yet. They will be copied over in Step 10.
- Save the file
- Rebuild BitWarden to apply our changes:
bash /opt/bitwarden/bitwarden.sh rebuild
- Before we switch out of our BitWarden service account, let's create the directory that will house our SSL certificates (replace example.com with your domain's name):
# Replace example.com with your domain
mkdir /opt/bitwarden/bwdata/ssl/bitwarden.example.com
- Once you created your SSL directory, you'll need to switch off of the BitWarden account and have access to an account with sudoer privileges
- BitWarden will need access to our SSL certificates. Let's Encrypt defaults them to the following directory (replace example.com with your domain):
/etc/letsencrypt/live/bitwarden.example.com/
- We'll need to copy the files within the above directory (obviously replace example.com with your domain) so that BitWarden can access said certificates. This can be fixed by running the following commands:
- Update example.com with your domain's name:
yes | sudo cp -Lf /etc/letsencrypt/live/bitwarden.example.com/chain.pem /opt/bitwarden/bwdata/ssl/bitwarden.example.com/chain.pem

yes | sudo cp -Lf /etc/letsencrypt/live/bitwarden.example.com/fullchain.pem /opt/bitwarden/bwdata/ssl/bitwarden.example.com/fullchain.pem

yes | sudo cp -Lf /etc/letsencrypt/live/bitwarden.example.com/privkey.pem /opt/bitwarden/bwdata/ssl/bitwarden.example.com/privkey.pem
- Set the permissions of the SSL certificates (replace example.com with your domain's name):
sudo chown -R bitwarden /opt/bitwarden/bwdata/ssl/bitwarden.example.com/
- Initialize BitWarden:
/usr/bin/sudo -u bitwarden /opt/bitwarden/bitwarden.sh restart

# If you get permission issues, switch to the bitwarden user and run the script
sudo su bitwarden
cd /opt/bitwarden
./bitwarden.sh restart
- BitWarden should go through its download process and install the necessary updates/files on the first run.
- If you followed along, you should now be able to browse to your self-hosted BitWarden instance: https://bitwarden.example.com/ (replace example.com with your domain)
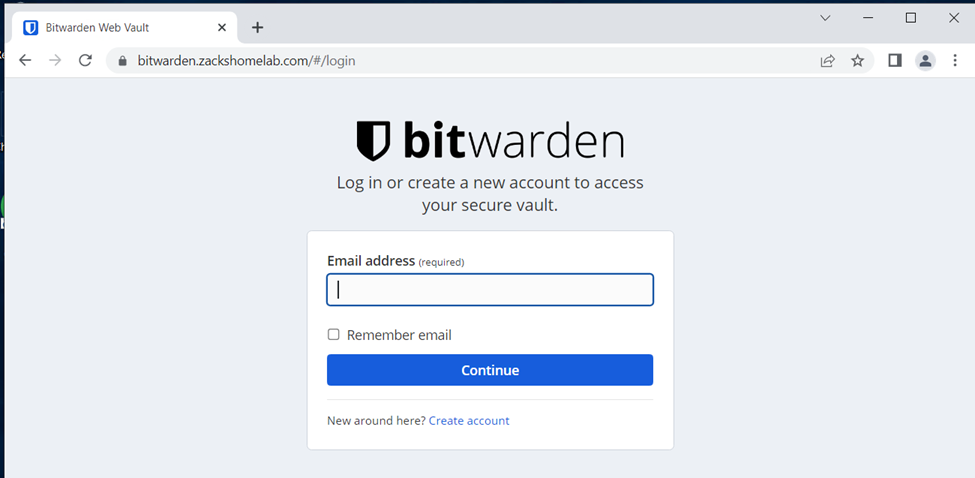
- Your online BitWarden account will NOT work for the self-hosted option. You'll need to create an account upon browsing to your new self-hosted vault, like so:
- Go through the create account instructions and input your email address and master password for your on-premise setup
- Once created, proceed to the next step
- In order to get access to the self-hosted admin portal, you'll need to configure SMTP within BitWarden. This will vary by your email provider (e.g., GSuite, OFF365, or your custom provider (e.g., NameCheap))
- Again, this will vary by organization. Your organization may use an already created email account like notifications@company.com or something along those lines to send off emails to internal employees for resetting passwords. I like to create new dedicated service emails for my services (e.g., bitwarden@company.com) so I know where the email is coming from.
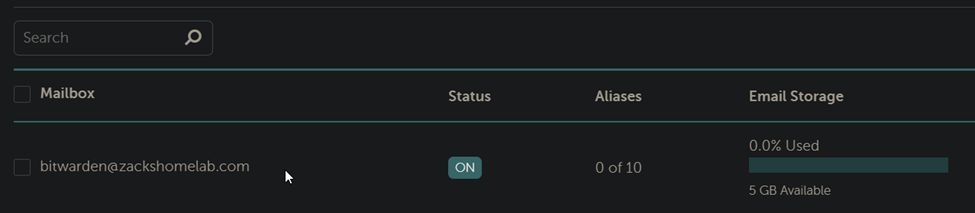
- So, in my example, I'll show how I would create an additional email account and add it to BitWarden Create Email Account
- For my homelab, I use NameCheap to handle my Email. (I'll probably switch to off365 at some point)
- Within NameCheap, there's a 'Private Email' section where I can purchase additional email accounts. If you use OFF365, you would go through the Exchange Admin Center to create a shared inbox, mail-enabled security group, etc.
- Now that I have my new BitWarden email account, I'll need to SSH into my BitWarden server and edit the global environment variables file.
- Switch to the BitWarden service account:
sudo su bitwarden
- Open the global environment variables file:
nano /opt/bitwarden/bwdata/env/global.override.env
- This file will have SMTP variables for you to configure and is dependent on your environment. For my environment, I will be using NameCheap's SMTP settings and my newly created email account.
- Here's the table of variables that may require updating:
| Current Values | New Values |
|---|---|
| # If this domain does not exist, BitWarden will Generate a 404 | # Replace with with an actual email account |
| globalSettings__mail__replyToEmail=no-reply@bitwarden.example.com | globalSettings__mail__replyToEmail=bitwarden@zackshomelab.com |
| globalSettings__mail__smtp__host=REPLACE | globalSettings__mail__smtp__host=INPUT_YOUR_SERVICES_SMTP_ADDRESS |
| # Replace this email with your own service email | |
| globalSettings__mail__smtp__username=REPLACE | globalSettings__mail__smtp__username=bitwarden#zackshomelab.com |
| # Add your Email Account's password | |
| globalSettings__mail__smtp__password=REPLACE | globalSettings__mail__smtp__password=YOUR_EMAILS_PASSWORD |
- Save the file
- Restart BitWarden:
bash /opt/bitwarden/bitwarden.sh restart
- Now, you'll need to elevate your newly created BitWarden account as the Organization Admin.
- SSH back into your BitWarden server if you have not done so already and switch to the BitWarden service account:
sudo su bitwarden
- Open the BitWarden Global Environment file:
nano /opt/bitwarden/bwdata/env/global.override.env
- To add our newly created BitWarden account as an admin, we'll need to adjust the adminSettings__admins= line, like so:
# Replace zack@zackshomelab.com with the email address of the account you just created
adminSettings__admins=zack@zackshomelab.com

# Note, if you want to have multiple admins, you would use commas in between email addresses like so:
adminSettings__admins=zack@zackshomelab.com,example2@zackshomelab.com
- Save the file
- Restart BitWarden:
bash /opt/bitwarden/bitwarden.sh restart
- Once BitWarden has restarted, browse to the admin panel (replace example.com with your domain): https://bitwarden.example.com/
- Log out of BitWarden if you were logged in before the restart
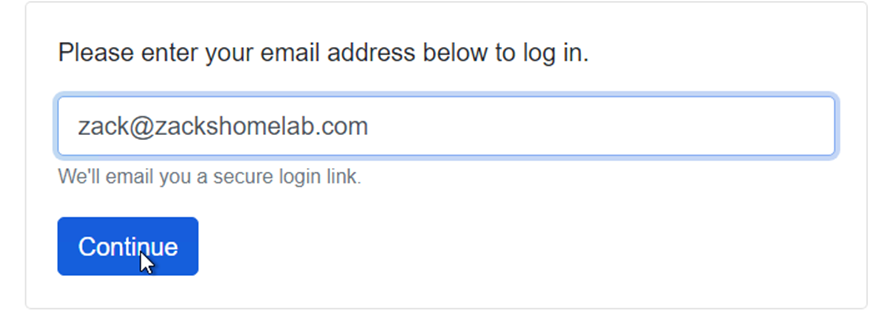
- Once logged out, go to https://bitwarden.example.com/admin (replace example.com with your domain)
- If you've configured SMTP (see Step 12), input your newly promoted admin account's email address and click Continue:
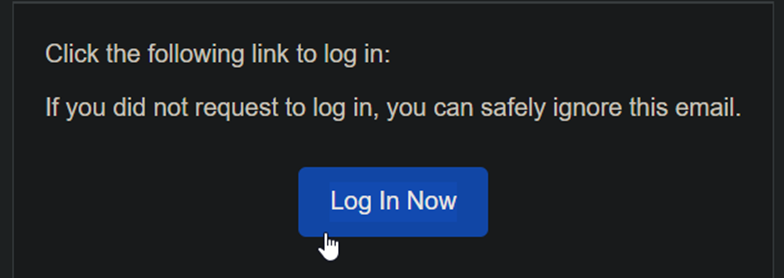
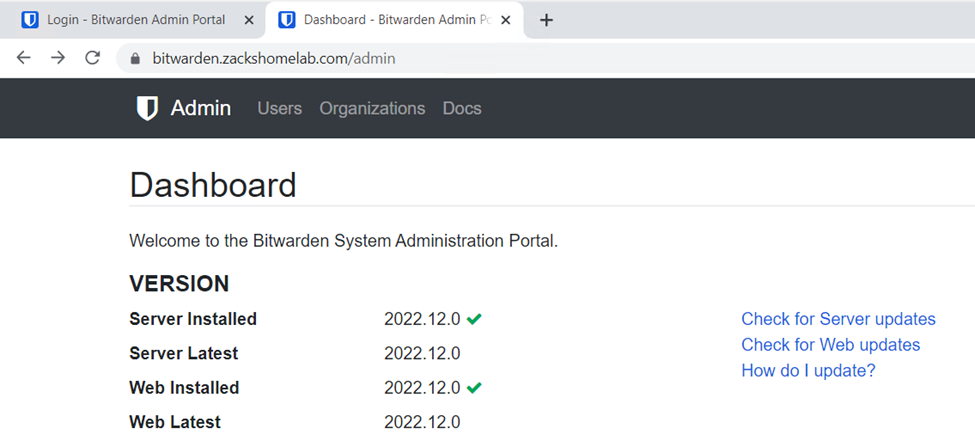
- Verify your email:
• You should be taken to the Admin Dashboard like so:
- Now that you are an admin, we'll need to verify your BitWarden account's email address for its personal vault
- Login to your Self-Hosted BitWarden Instance: https://bitwarden.example.com/ (replace example.com with your domain)
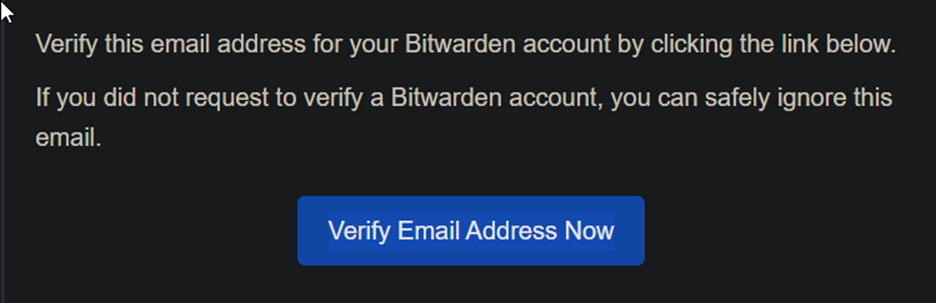
- Click Verify Email:

- Go to your email and click the pretty blue button:
- Login
• In Step 6 of this chapter we created our organization. We'll need to add our organization to our self-hosted BitWarden. This will require us to download our subscription file from our online BitWarden account. This can be done by following:
-
- Browse to the online BitWarden vault: https://vault.bitwarden.com/
-
- Login with your account you created in Step 6
-
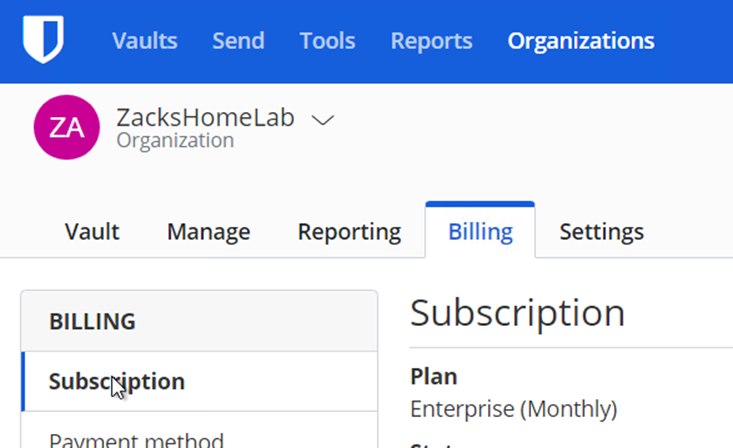
- Click Organizations upon login:

- Click Billing - Subscription:
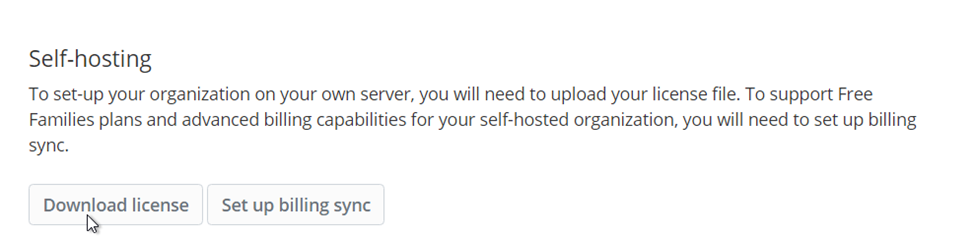
- Under Self-hosting, download the license:
- Enter your installation ID from Step 7 (NOTE: if you forgot it, you can view your installation ID by opening the global environment variables on your server /opt/bitwarden/bwdata/env/global.override.env)
- Once downloaded, login to your self-hosted BitWarden instance (https://bitwarden.example.com/ (replace example.com with your domain))
- Once logged-in, click New Organization on the left-hand side:
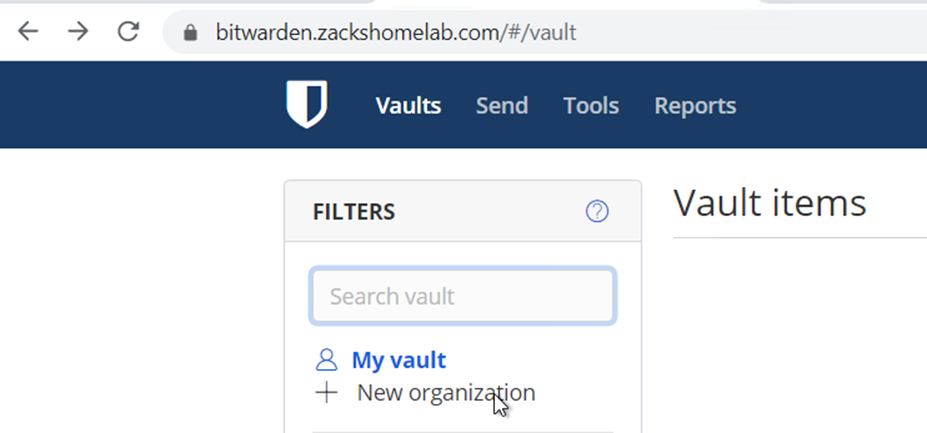
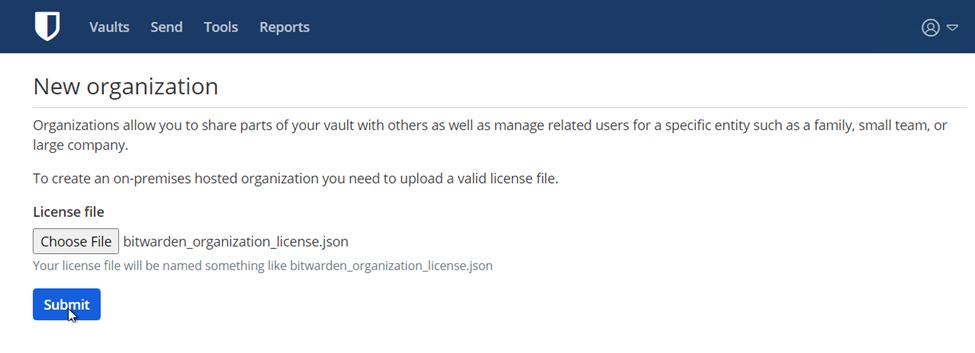
- Upload your downloaded license file from earlier and click Submit:
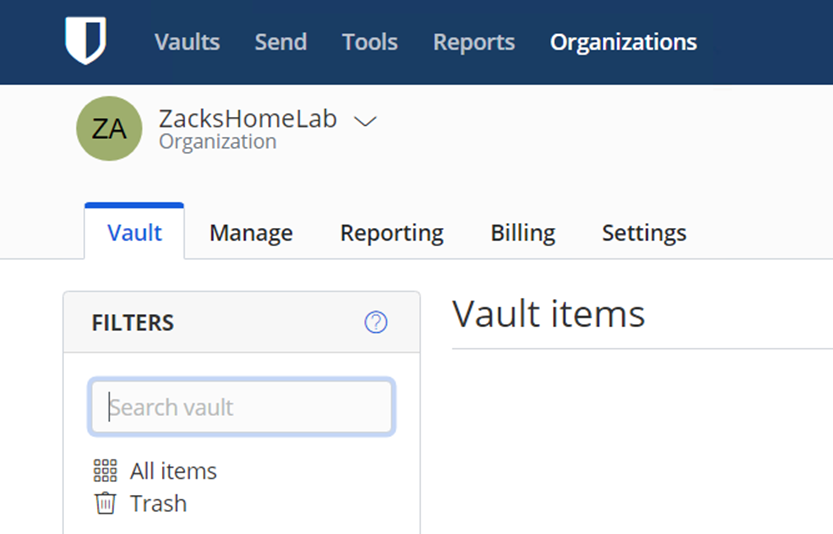
- The organization you created in Step 6 should now reside on your Self-Hosted Server:
- And there you have it! You have now deployed a Self-Hosted Bitwarden Instance!
- The next chapter is demonstrating how to automatically maintain BitWarden. These instructions include:
-
- How-To Automate SSL Renewal
-
- How-To Automate Backups
-
- How-To Automate Software Updates/Upgrades
-
- How-To Restore from Backups