If you know HTML and JavaScript, you already know how to build interactive IoT systems. DOMIoT lets you use the DOM and web standards to control real-world devices.
DOMIoT uses the standard DOM API, exposing familiar web development methods such as getElementById, setAttribute, and addEventListener. This allows interaction between web applications and physical devices using the same HTML/DOM interfaces you use to code a web page.
git clone https://github.com/domiot-io/domiot-browser.git
cd domiot-browser
npm install
Test drivers are required to simulate hardware for the examples on Linux. If you already tested and want to use other drivers, you can skip this step.
git clone https://github.com/domiot-io/drivers.git
cd drivers
./build-and-load-all-sim.sh
cd ../domiot-browser
npm start
# or
node server/bdcom-server.js
- Go to the
examples/directory. - Open any HTML file in your browser, for example: /examples/0-buttons-shelving-units/index.html .
- See your browser and (simulated) hardware respond together.
This example shows a supermarket aisle where pressing a button next to a product lights up the shelf and plays a video overlay. It's a perfect demo of how DOMIoT connects the physical and digital worlds!
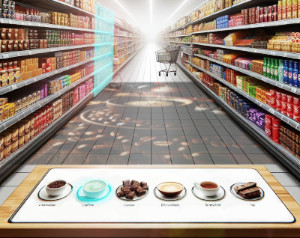
Scenario:
- 6 physical buttons, each mapped to a shelving unit.
- The shelving unit with color ligths control (white/blue).
- Video is projected with promotional content.
How it works:
- Customer presses a button 2) The shelving unit lights up blue and a video is projected.
HTML (simplified):
<html>
<script src="bdcom.js"></script>
<script src="domiot-browser.js"></script>
<script src="retail-elements.js"></script>
<script src="iot-bindings.js"></script>
<iot-aisle id="aisle6" style="display:none;">
    <iot-ibits-button-binding id="a6ButtonBinding" location="/dev/ihubx24-sim0">
    <iot-obits-color-binding id="a6ColorBinding" location="/dev/ohubx24-sim0">
    <iot-button id="a6Product1Button" shelving-unit-id="a6L1" binding="a6ButtonBinding">
    <iot-shelving-unit id="a6L1" name="Ground Coffee" video-src="videos/coffee-beans-by-Mixkit.mp4" style="color:white;" binding="a6ColorBinding">
</iot-aisle>
<body>
  <!-- Web component meets web media: -->
  <video id="promoVideo" width="640" height="360" controls style="display:none;"></video>

</body>
<script>
</script>
    const button = document.getElementById('a6Product1Button');
    const shelvingUnit = document.getElementById('a6L1');
    const video = document.getElementById('promoVideo');

    button.addEventListener('press', () => {
        shelvingUnit.style.setProperty('color', 'blue'); // Lights up the shelf
        video.src = shelvingUnit.getAttribute('video-src');
        video.style.display = '';
        video.load();
        video.play();
    });

    button.addEventListener('release', () => {
        shelvingUnit.style.setProperty('color', 'white');
        // ...
    });
</html>
What you see:
- Press a physical button: shelving unit glows blue, video appears and plays.
- Release: shelf returns to white, video can be hidden/stopped (etc.).
Find other examples here .
- HTML Elements represent real-world devices (physical buttons, shelving-units, items, rooms, etc.).
- Bindings connect those elements to physical hardware via drivers.
- Binding-to-Driver Server (BDCOM server) bridges your browser and the drivers.
- Drivers talk to the actual devices (or simulations).
Data Flow:
- Button press → Driver → BDCOM Server → Binding → DOM
pressEvent dispatched on<iot-button>element - DOM style change → Binding → BDCOM Server → Driver → Relay switch action
- browser/: Client-side JS libraries
- server/: WebSocket server, driver managers, config
- examples/: Ready-to-run HTML demos
- examples/lib: Contains DOMIoT libraries used in the examples (domiot.js, bdcom.js, iot-bindings.js and element libs).
DOMIoT Browser uses:
-
iot-bindings-browser: Collections of HTML/DOM binding elements for linking DOM elements with physical components.
-
iot-elements-browser: Collections of HTML/DOM IoT elements (, , etc.) organized by domain (home, retail, hospitality, etc.)
-
drivers: A collection of drivers for IoT systems. Includes mock drivers for integration/testing.
Edit server/config.js to change the WebSocket port, add security, or tweak streaming options.
module.exports = {
  port: 8080,
  securityMiddleware: securityMiddleware, // Optional
  streaming: { /* ... */ }
};The securityMiddleware used in BDCOM server can be specified in server/config.js .
The BDCOM server includes security middleware that controls which drivers bindings can communicate with, and what data they can exchange. This middleware is located at server/security-middleware.js and can be customized by users to implement their own authentication, authorization, or access control logic.
The default Security Middleware uses a security whitelist in server/allowed-paths to control which driver paths are allowed for communication. This prevents unauthorized access to system devices.
# BDCOM Security Whitelist - Allowed Driver Paths
/dev*-sim*
/dev/phidgetvintx60*
# *  # Allow all (development only)
When a binding attempts to connect to a driver path, the server checks it against these patterns. Use specific patterns for production deployments.
The BDCOM server uses modular driver managers to handle communication with hardware drivers. This design allows you to implement custom driver managers for different operating systems or communication protocols.
The default implementation includes:
driver-read-manager-unix.js- Handles reading sensor data from Linux device files using streamsdriver-write-manager-unix.js- Handles writing actuator commands to Linux device files
To support other platforms (e.g., Windows) or communication methods (e.g., serial, USB, network), create your own driver managers by extending the base classes and implementing the required methods:
Driver Read Manager API (extend driver-read-manager-base.js):
class DriverReadManagerCustom extends DriverReadManagerBase {
  constructor(streamingConfig, subscriptionManager, clientRegistry)

  // Required methods to implement:
  async startTopicReading(topic)     // Start reading from device/topic
  stopTopicReading(topic)            // Stop reading and cleanup
  notifySubscribers(topic, data)     // Send data to subscribed clients
}
Driver Write Manager API (extend driver-write-manager-base.js):
class DriverWriteManagerCustom extends DriverWriteManagerBase {
  constructor(streamingConfig)

  // Required methods to implement:
  async write(topic, message)        // Write message to device/topic
}Integration: Update bdcom-server.js to use your custom managers instead of the Unix versions.
- Windows Support: Implement COM port or WinUSB communication
- Network Devices: Communicate with IoT devices over TCP/UDP
- Serial Communication: Direct RS232/RS485 device control
- Cloud Integration: Bridge to cloud IoT platforms
- Custom Protocols: Support proprietary device communication
- Security: Add encryption or authentication layers
This modular design ensures DOMIoT can work with any hardware platform while keeping the browser-side API consistent.

The setup and operation of an IoT system using HTML and the DOMIoT is as follows:
Physical components (e.g., sensors, actuators, displays, etc.) should be in place and connected directly or indirectly to a computer such as a single-board computer (SBC) with the appropriate drivers installed, along with a DOMIoT implementation running. Once the HTML is parsed and the DOM tree is generated, the DOMIoT establishes the declared bindings, linking DOM elements to physical components.
Scripts can use the DOMIoT API to access and modify element attributes through methods such as getElementById, getAttribute, setAttribute, and setProperty. When a binding detects a relevant change in an attribute (including CSS properties), it translates this change into a driver-understandable value and communicates it to the driver, for example, by writing to a driver file. In the other direction, physical changes are communicated from the physical components to the bindings through their drivers, allowing the bindings to update element attributes (including CSS properties) and/or dispatch events. Scripts listening to these events, which are triggered by physical interactions, an can then react by updating attributes, resulting in changes to the physical components of the interactive IoT system.
-
Buttons Shelving Units - Basic IoT Interaction: This example demonstrates fundamental DOMIoT Browser concepts through a retail store aisle interface where physical button presses trigger video overlays and light color changes on shelving units.
-
Retail Store Podium with Touch Screen - Interactive Display: This example showcases the integration of physical touch buttons with a web application, allowing physical button presses and releases to modify web page elements.
-
Six Physical Buttons Connected to a Phidget VINT Modify Div: Showcases the integration of physical touch buttons with a web application, allowing physical button presses and releases to modify web page elements.
MIT